Tag Archives: jenkins

An Nginx Configuration For Jenkins

Lots of people have posted configurations of Nginx to allow effective proxying of Jenkins when they are both on the same server, but for some reason, it seems that having them on different servers doesn’t seem as commonly discussed. I am using Nginx in my SOHO network to front a few virtual servers, and provide them all via the few IPs I have on my Comcast Business Class connection. That means having a proxy that can serve up the various systems supporting various domains.

We’ve covered how to build a Jenkins server, so for the sake of documenting this additional capability, here’s my configuration:

server {
  listen 80;
  server_name jenkins.domain.com;

  access_log /var/log/nginx/jenkins_access.log main buffer=32k;
  error_log /var/log/nginx/jenkins_error.log;

  rewrite /jenkins/(.*) /$1 last;

  location / {
    proxy_pass       http://192.168.1.115:8080/jenkins/;
    proxy_redirect   off;
    proxy_set_header Host $http_host;
    proxy_set_header X-Real-IP $remote_addr;
    proxy_set_header X-Forwarded-For $proxy_add_x_forwarded_for;

    # max upload size
    client_max_body_size       20m;
    client_body_buffer_size    128k;
    proxy_connect_timeout      90;
    proxy_send_timeout         90;
    proxy_read_timeout         90;
    proxy_buffer_size          4k;
    proxy_buffers              4 32k;
    proxy_busy_buffers_size    64k;
    proxy_temp_file_write_size 64k;
  }

}

Continuous Integration With Jenkins On Ubuntu 11.10

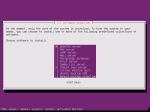
First, install Ubuntu Server 11.10. Obviously, settings will vary from machine to machine, but when you get to the page for selecting software to be installed, make sure you select both the OpenSSH server and the Tomcat server.

Ubuntu Software Selections

With a fresh server install, you’ll want to assign a static IP to your server. Ubuntu Server 11.10 will likely detect your network card, and set it up during install to use DHCP. But, it makes more sense for a server to have a stable IP. You can change this in /etc/network/interfaces. Change the section that likely reads as:

iface eth0 inet dhcp

to something like:

iface eth0 inet static
  address 192.168.x.x
  netmask 255.255.255.0
  gateway 192.168.x.1

Of course, use whatever local LAN network addresses make sense for you. Either restart the network service (sudo /etc/init.d/networking start) or reboot.

When you’ve rebooted, make sure to update Ubuntu itself.

$ sudo apt-get update
$ sudo apt-get upgrade
$ sudo reboot

Jenkins is a Java app that needs some environment to run it. We’ve already installed Tomcat for this through the Ubuntu installer. You can verify it is running by surfing to: http://[your IP address]:8080. You may also want to configure http://[your IP address]:8080/manager/html. Surfing over to that page will give you the info needed to configure the status page viewer when you fail login on the attempt on the new Tomcat server. The other reason is that this management page allows you to easily deploy the Jenkins WAR too. Download the WAR for the Ubuntu distribution and upload it via the Tomcat manager app.

If you now surf over to http://[your IP address]:8080/jenkins, you will see Jenkins, but in an error state. It will complain that it is “Unable to create the home directory ‘/usr/share/tomcat6/.jenkins’. This is most likely a permission problem.”. Well, at least Jenkins is running! The easy way to solve this is to let Tomcat have access to that folder.

$ cd /usr/share/tomcat6
$ sudo mkdir .jenkins
$ sudo chown tomcat6:nogroup .jenkins
$ sudo /etc/init.d/tomcat6 restart

That should get you going on your adventure in continuous integration with Jenkins.